Hello!!!!!!! I have lots to share, so buckle up!
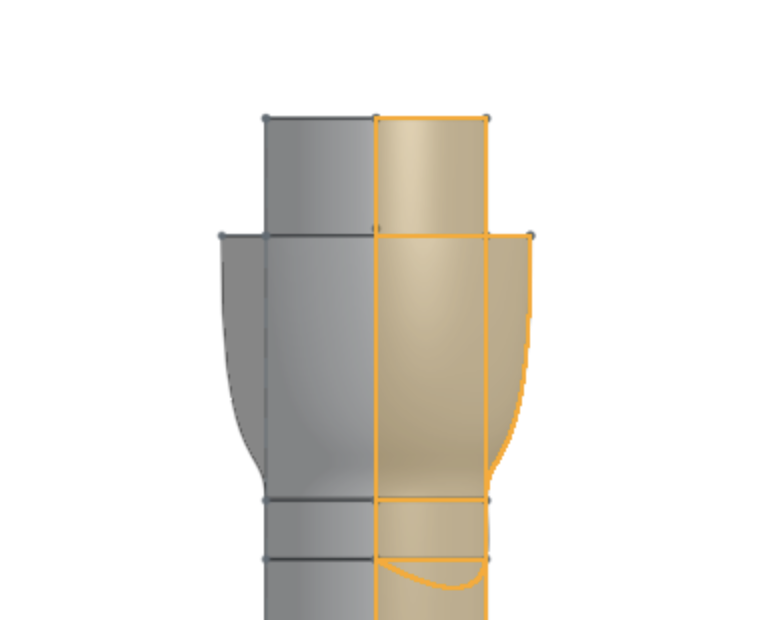
I’ve been focussing on the bell of the tenor drone. The bell is the space inside the top of the drone that acts as a resonating chamber, amplifying the sound. It is essential to ensure this part of the process is not overlooked, as the drones won’t sound correct with a misshapen bell. You can see the shape of the bell, and where it sits within the drone, below!
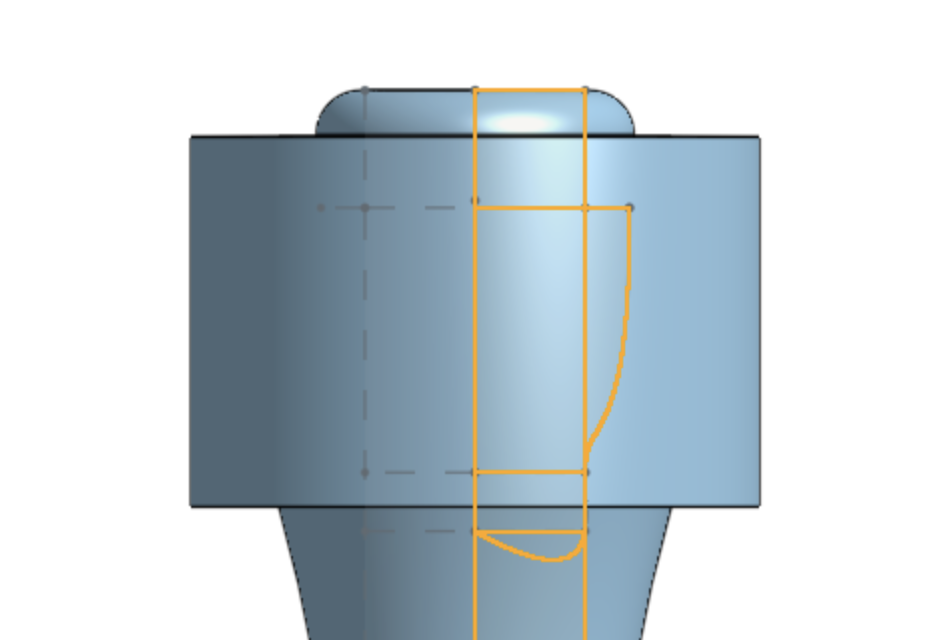
A large part of this project is softening the hard angles of the interior of the pipes. I’ve been adding small fillets to each 90º angle, just to slightly take the sharp edges down. I’ve included another picture of the entire interior of the tenor drone below. This is an image of the shape that is removed from the overall top of the drone.

I also decided to remove the beading and combing from the drone. Though it looks great, and I may add it back later, it was causing a bit of trouble when I was adjusting the shape of the piece.
Speaking of adjusting the shape: I printed the top of the tenor drone last week on Rebecca’s Anycubic Mega X printer in Prusament PETG. The supports were a bit tough to remove, and I ended up having a rough looking part, but I was hopeful for how it sounded.
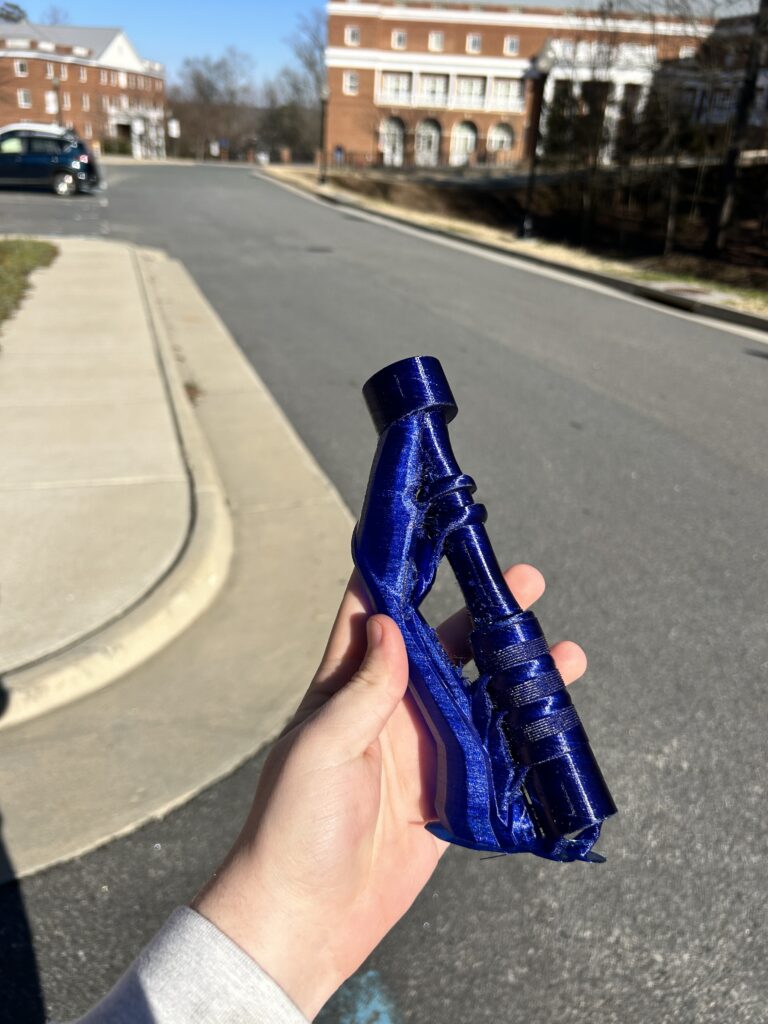
Because I printed it a 45º, in hopes it would add to the durability, the inside of the drone was a bit of a stringy mess. I used a heat gun to melt some of the strings back down, but it was still messy and I was nervous it would affect the sound. I asked around for advice; Cartland and I were looking for cylindrical and curved files, to smooth out the rough parts of the interior. I figured that was the best route, so I decided to head over to Harbor Freight.
On my way, I stopped by Jepson to see if Rebecca had any ideas about cleaning out the inside. We ended up taping some sandpaper around a screwdriver, and it worked well! Sometimes it is the janky things that work the best (and the quickest).
I took my shiny new drone to bagpipe practice this past Wednesday, the 21st. We gave it a try, and it was giving me the same warbley sound that the first iteration was. My pipe major, Olivia, along with myself and Rebecca were working on it for a bit, and we eventually got it sounding alright. We had to pull the drone all the way to the end of the tenon (the bottom half of the tenor drone), and it was hanging on by a hair, but it worked! Olivia and Rebecca speculated that this could be happening because the interior diameter of the drone is too narrow by a minute amount, or that the infill density is too low.
My reshaping of the tenor drone today included widening the diameter ever-so-slightly. I will print it off next week and see what happens.
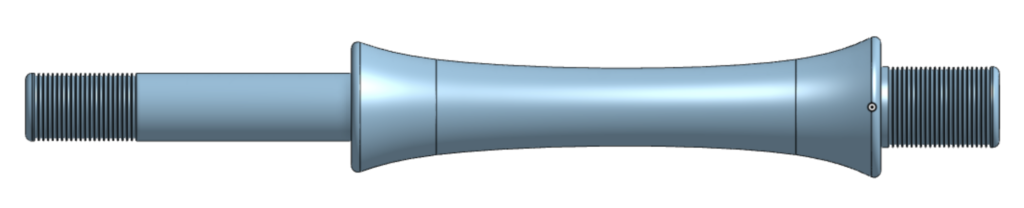
I finished up today with putting the finishing touches on the first model of the tenor drone bottom. I used the same technique that I did for the beading and combing for the spot that the hemp will be wrapped around. This will make more sense later! I’ve included a picture below!
I’ll print this off next week as well, and hopefully we will having a fully-functional tenor drone!
Later!